
REVIEW · EVEREST BASE CAMP TREKS FROM KATHMANDU
Everest Base Camp Trek 15 days | Local Guide | Flexible Itinerary
The mountains start testing you on day two. This Everest Base Camp trek turns the classic Sherpa trail into a paced plan, with Lukla flights and Kala Patthar panoramas that feel like they go on forever.
I like that the trip is built around acclimatization stops (not just pushing forward) and that it comes with real trekking support so you are not juggling logistics at altitude.
One consideration: plan for cold nights, because there are no hot showers and no battery charging during the trek.
Quick hits before you go
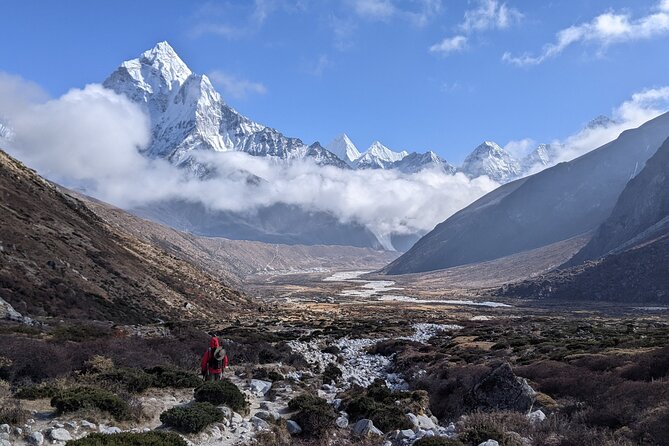
- Lukla via Tenzing-Hillary airstrip: a big moment that gets you into the Everest region fast
- Acclimatization rhythm: Namche, Everest View Hotel (3440 m), and Dingboche help you adjust
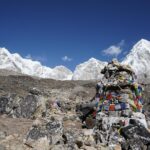
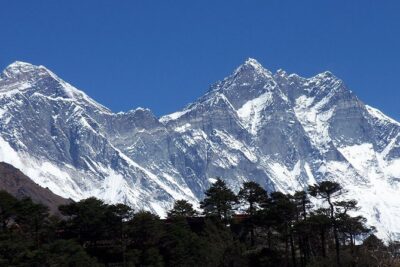
- Kala Patthar (5545 m): early hike for the Everest, Lhotse, and Nuptse view
- Tea house and lodge trek comfort: clean, comfortable stays and menu-based meals
- Porter math that matters: 1 porter per 2 people, carrying up to 20 kg total
- Licensed English-speaking guide support: plus an assistant guide for 5+ guests
How a 15-day Everest Base Camp trek balances big views with safety-first pacing
This kind of Everest trek is not just about checking off a summit of sorts. It is about how you get there, and how your body handles the altitude step by step. What I like here is the trip’s focus on guest safety, satisfaction, and comfort, using a local guide to keep the pace realistic and the plan flexible enough to reduce altitude stress.
You will follow the classic Sherpa trail on a structured 15-day schedule, reaching Everest Base Camp at 5364 m and then pushing higher to Kala Patthar at 5545 m for the famous panorama. You also get time in key villages for acclimatization, including Dingboche and a dedicated day around 3440 m at Everest View Hotel.
The trade-off is that you should not expect a resort-style experience. Nights are cold, you eat basic but solid lodge food, and you go without hot showers or charging power while trekking. If you want comfort, this trek gives you practical comfort, not luxury.
You can also read our reviews of more guided tours in Kathmandu
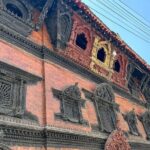
Kathmandu arrival day: pickup, orientation, and getting your feet under you
Your trip starts in Kathmandu, with a representative greeting you at Tribhuvan International Airport and transferring you to your hotel. This matters more than it sounds. Kathmandu can be hectic, and after international travel, a smooth pickup helps you start the trek day mentally calm and physically ready.
On this day you will also be dealing with the real-world stuff: confirming details with your guide team, finalizing what you brought, and getting your trekking plan organized. If you are using the included trekking gear (poles, sleeping bag, and down jacket), this is the time to make sure you understand how it all fits and where it goes.
Tip: keep your first-day essentials accessible. You will move fast later, and airport-to-hotel days are great for fixing small problems before the hiking begins.
Lukla flights from Kathmandu or Ramechhap, and the weather reality
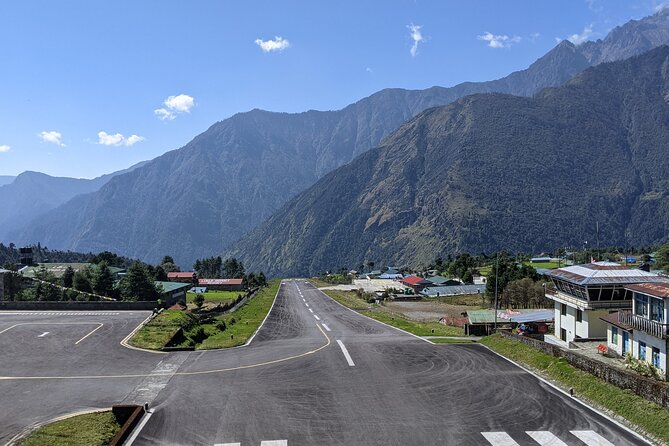
Day two is your jump into the Everest region: an early flight to the Tenzing-Hillary airstrip at Lukla (2810 m). This is one of those “you are really doing it” moments. The flight itself is included, and the route is set up so everyone in the group flies in and out as part of the same package.
There is one reality check. Flights in this region require good weather. If conditions are poor, you may face schedule changes, and the trip states that good weather is required. That is normal for Everest, but it is still worth planning your mindset around it.
What you should do: treat the day as altitude, not as sightseeing. Once you land, the goal is to start moving your body gently, not proving anything. And because the trek is later paced for altitude, you do not need to overdo it early.
Sherpa trails to Namche Bazaar via Hillary Bridge
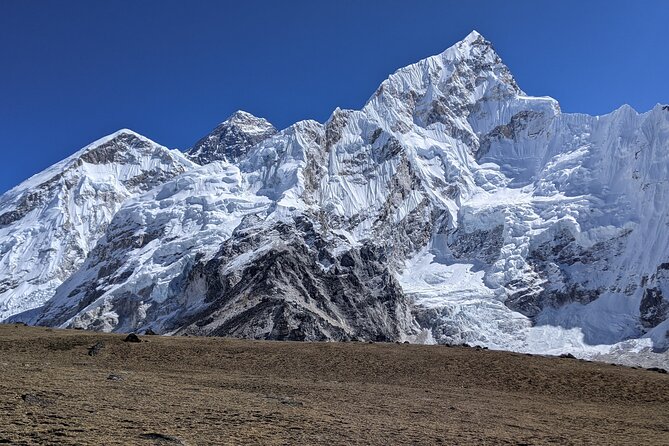
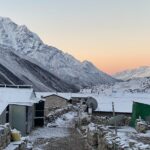
After a tea house breakfast, you walk toward Namche Bazaar, the Sherpa hub where most Everest treks “click” into high-altitude mode. This day is built around a steady approach and includes a stop at Hillary Bridge, a well-known crossing point on the trail.
The walk is about five hours before arriving at Namche. Namche at higher elevation changes everything: breathing feels different, and the rhythm slows slightly. This is exactly where a good guide helps. Your guide’s job is to keep you moving steadily, with breaks that feel normal, not frantic.
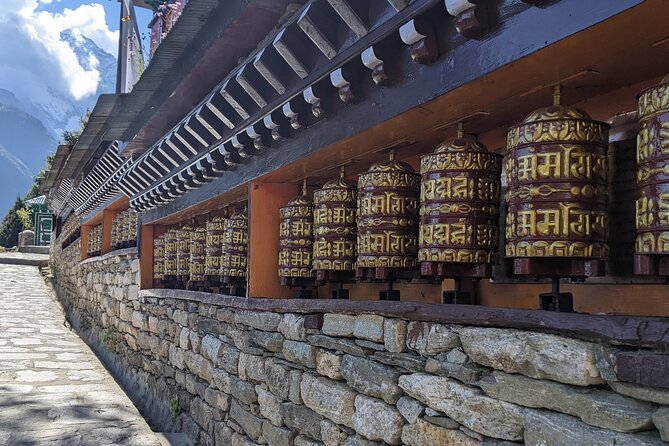
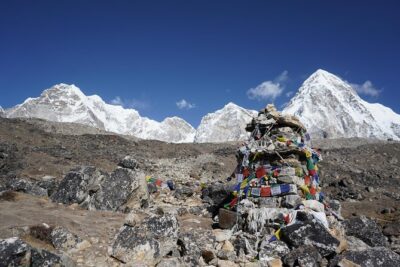
You will also get that classic Everest trek texture here. Tea houses, fellow hikers, prayer flags, and the sense that you are in a working mountain community, not a theme park. The trip includes items tied to key stops, so you are not stuck hunting for tickets mid-walk.
Everest View Hotel at 3440 m: the acclimatization day that really pays off
Day four includes an extra buffer day at 3440 m around Everest View Hotel. You are high enough here that your body needs time to adjust. This is not optional fluff. It is one of the biggest levers you have to reduce the odds of altitude sickness.
Your route likely includes simple side activity options to stay moving without exhausting yourself. The goal is to give your body the chance to adapt while you stay in control of exertion levels. If you have ever wondered why some people breeze through Everest and others struggle, this is where the difference usually shows up.
Practical takeaway: use this day to hydrate, eat carefully, and keep a conservative pace. If your body feels off, this is the day to tell your guide and adjust plans.
You can also read our reviews of more hiking tours in Kathmandu
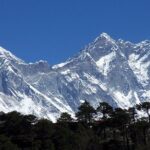
Tengboche Gompa and the monastery morning above the river valleys
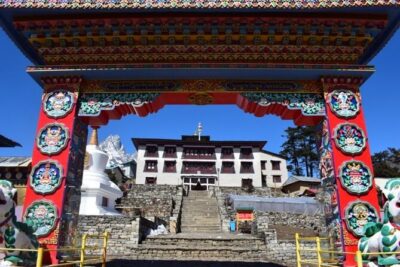
Today you climb from Namche toward Tengboche (around five hours of walking up from Namche area). The big highlight is the stop at Tengboche Gompa, a monastery stop that adds meaning to the trek beyond just scenery.
This is where culture hits. You are walking through Sherpa country and reaching a place of worship that many trekkers remember long after the view fades from memory. The trip includes admission tied to this stop, so you have less friction when you arrive.
One caution: monastery days often mean photos, slower sightseeing moments, and more time standing still. Standing still at altitude can feel colder and harder on your breathing. Dress for that, and keep layers ready.
From Dingboche approach to a planned rest day at altitude
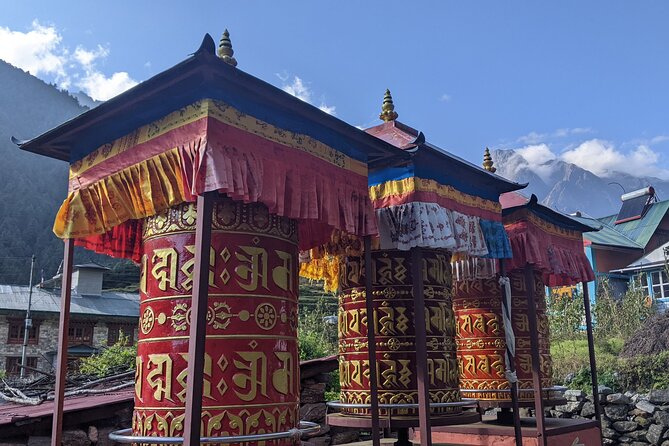
Day six continues the trek toward Dingboche. You follow the Imja Khola area, crossing a bridge, then moving through the route junction where Orsho and Pheriche connect toward Dingboche. This section is typical of Everest treks: steady walking with terrain that asks for focus, not speed.
Day seven is your second key acclimatization stop at Dingboche. Here the plan specifically notes a rest day that keeps you active with side excursions. That is a smart balance. You want to keep blood moving and your lungs working, but you do not want a long push that turns acclimatization into a penalty.
From a practical perspective, this is where you start feeling the trek as a system. Your schedule is not just a sequence of villages. It is a body management plan. If you do not feel great on day seven, this is the day when slowing down is most useful.
Thugla and the glacial approach toward Everest Base Camp (5364 m)
As you move forward, the itinerary brings you to Thugla, described as a perfect spot for a lunch stop before continuing toward the glacier approach. This is the kind of small detail that matters. Eating well and on time at altitude keeps you steadier for the final stretch.
Day nine is the big one: Everest Base Camp at 5364 m. The trek description emphasizes that this is the most fascinating and adventurous day, and it really does feel like that when you finally arrive. It is a long wait leading up to the base camp zone, and you earn the moment.
What you should expect: crowds can be part of the experience at Base Camp, but the bigger reality is the altitude and the visuals. It is cold, windy, and the “scale” of the mountains becomes physical. Your guide’s role is crucial here, helping you stay safe around icy terrain and changing weather.
Kala Patthar (5545 m) for the Everest, Lhotse, and Nuptse view
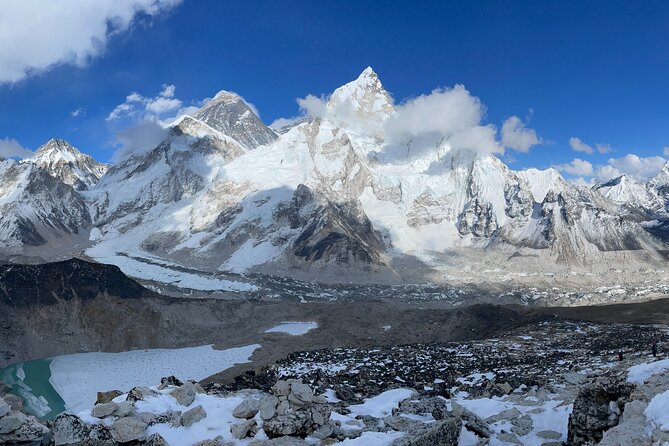
Day ten starts very early for the hike to Kala Patthar (5545 m). This is the highest point on the trip and the payoff morning. You get the most breathtaking view of Mt. Everest plus other major peaks, including Lhotse and Nuptse.
This is the hardest day for most people, mainly because it is early, high, and done with thin air. The pace should be slow. The goal is steady breathing, short bursts of walking, and frequent checks in with yourself.
Practical tips that will help you: start warm with layers ready, and keep your energy for the last stretch instead of spending it on early frustration. If you push too hard too soon, you will pay for it on the way up or down.
Pangboche, Phorste, and a less crowded route back through Sherpa country
After Base Camp and Kala Patthar, day eleven turns into a descent toward Pangboche, with a move to a newer, less crowded route passing by Phorste. This part of the itinerary is interesting because it prevents your return days from feeling like a repeat.
Along the way, you get views of major peaks mentioned in the plan, including Ama Dablam and Thamserku, plus you can spot the Tengboche monastery from the trail depending on conditions.
Descent days are still tough at altitude. Your legs may feel fine at first, then fatigue catches up. Watch your footing, especially with ice patches or steep sections. A good guide keeps you on the safest lines rather than the fastest ones.
Gokyo connection and the less crowded feel near Phorste Thanga and Mong Danda
Day twelve is the big routing shift: the plan describes a trek down toward a river coming from Gokyo lake, then connecting to the trail to Gokyo at Phorste Thanga (3680 m). It also mentions a trek up to Mong Danda.
This is the part of the trip that can feel different from a standard straight EBC route. If you like a route that feels less crowded and more varied in scenery, this day is part of why people describe the trek as memorable beyond the famous endpoints.
It also means you should keep your energy management tight. More route variety can lead to longer feeling days. Stick to your guide’s pacing and take rests that you can actually recover from.
Lukla to Kathmandu: finishing strong and taking a real break
Day thirteen continues the return route described as passing Toktok, Phakding, Ghat, and Cheeplung (2650 m), then the final section back toward Lukla. Once you reach Lukla, you are done hiking. You enjoy the evening in Lukla, which is a good moment to decompress.
Day fourteen starts with an early flight to Kathmandu and then offers the rest of the day at leisure. This is not a sightseeing day forced into your schedule. It is a time to recover, eat something easier, and figure out what you want to do in Kathmandu with a clear head.
Day fifteen is your last day in Nepal, transferring you to Tribhuvan International Airport for your departure flight.
Gear, lodges, and food: what you get, what you should plan for
This package is designed so you do not arrive to Everest with a spreadsheet of gear purchases. It includes hiking poles, a sleeping bag, and a down jacket. The items are to be returned after the trek, so plan to use them properly during the journey, not treat them like souvenirs.
Domestic flight weight limits are part of the logistics too. The trek includes 10 kg big bag and 5 kg handcarry allowance per person for domestic flights, totaling 15 kg. On top of that, you get a porter system: 1 porter per 2 people, carrying up to 20 kg total, split as 10 kg per person.
That porter setup is a value win because it makes your body the main load. When you are walking for hours at altitude, small weight differences matter.
Food and lodging: the trip describes clean and comfortable lodge accommodation and hygienic food chosen from the lodge menu. Meals included during the trek are substantial: breakfast (14), lunch (12), and dinner (13). You are not on your own for every meal.
What is not included is equally important: hot showers and battery charging are not provided during the trek. You should also bring personal snacks and beverages, since those are not included. Pack for cold nights, not just walking days.
Guide and porter team: English support and lighter walking
A trek like this lives or dies on your guide’s judgment. The plan includes an English-speaking, experienced, license holder guide. If the group has 5 or more guests, there is an assistant guide, which usually means better pacing, more attention, and smoother decision-making.
The included porter setup reduces the load and gives you a partner for day-to-day logistics. Strong, helpful porters are named repeatedly in past experiences, which makes sense in a trek where everyone is walking in thin air and slow weather windows.
In real examples tied to this operator, I saw names showing up such as Raj as a guide with porters Suren and Sonam, and a different trek experience where Shiba handled planning support. Other names that came up include guide Sagar with porters Jal and Sonam, and another trip where guide Rabin and porter Prakash were central to getting people through the hardest days. It is not about celebrity guides, it is about consistent competence.
What it means for you: you should feel safe asking questions, and you should feel guided on pacing. A team that focuses on safety and satisfaction helps you handle the emotional side of altitude too, the part where you start bargaining with yourself.
Altitude sickness prevention, explained in plain terms
This trip explicitly builds an itinerary to avoid altitude sickness. You will see that in the schedule: acclimatization at Namche, an extra day around Everest View Hotel at 3440 m, and another stop for acclimatization in Dingboche.
Here is the simple way to think about it. Your body needs time to adjust. If you rush higher every day, symptoms become more likely. If you stay active but not exhausted, and you allow rests at planned elevations, your body has a better chance to adapt.
Even with a smart plan, altitude still requires your participation. Tell your guide early if you feel headache, nausea, unusual fatigue, or worse. Do not tough it out alone. The guide team in this plan emphasizes security and safety, and that only works when you speak up.
Also, use those tea house stops. Drink, eat, and keep warm. The cold and the thin air together can make you feel weaker than you expect, even if your hiking pace is reasonable.
Price $1,890: where your money goes, and what you still must add
At $1,890 per person, this package can look expensive until you break it down. You are paying for a lot of hard-to-replicate items: flights to and from Lukla (via Kathmandu or Ramechhap), permits including the Sagarmatha National Park permit, and the TIMS permit plus a local rural area permit.
You also get the guide and porter system, plus trekking essentials like sleeping bag, down jacket, and poles. Accommodation and most meals are included during the trek, which reduces the daily spending stress.
What is not included is important for your final budget. You will add:
- International travel and visa fees
- Travel insurance that covers up to 6000 m (the operator lists $200 per person as an amount for that kind of coverage)
- Tips for guide, porters, and drivers
- Lunch and dinner in Kathmandu
- Personal snacks and beverages
- Extra nights, plus hot showers and charging during the trek
My value take: you are paying for fewer moving parts and better altitude management. If you plan to self-arrange flights, permits, a guide, and a porter setup, the cost can climb quickly, and the risk goes up too. For Everest, paying for planning that focuses on safety is usually money well spent.
Who should book this Everest Base Camp trek
This is a strong fit if you want:
- A private group experience, with your team only
- A local, English-speaking, license-holding guide and porter support
- A plan with acclimatization days, not just a grind
- Clean lodge stays and included meals for the bulk of the trek
You should think twice if you need daily hot showers or reliable charging during the hike. You also need a strong physical fitness level, because even with rest days, Everest Base Camp and Kala Patthar are serious.
It is also a good match for people who like Sherpa culture stops like Tengboche Gompa, and for folks who do not want every day to feel identical. The routing that includes connections around Phorste and Gokyo side trails gives a more varied feel.
Should you book with Life Himalaya Trekking for Everest Base Camp?
If your priority is a well-managed Everest trek with real support, I think this is a good booking choice. The strongest reasons are practical: the included guide and porter structure, the acclimatization-focused schedule, and the fact that flights, permits, trekking gear, and most meals are already covered.
Before you decide, be honest about your comfort needs. No hot showers or charging is a real adjustment. Also, make sure your travel insurance covers you up to 6000 m, because that is not an area where you want to cut corners.
One more note for peace of mind: the trip mentions free cancellation up to 24 hours in advance for a full refund, and it also notes that poor weather can trigger a date change or a refund. That matters on Everest, where weather is part of the plan.
FAQ
How high do we hike on this Everest Base Camp trek?
You reach Everest Base Camp at 5364 m and then go up to Kala Patthar at 5545 m, the highest point of the trek.
What trekking gear is included?
The trip includes hiking poles, a sleeping bag, and a down jacket. The items are to be returned after the trek.
Are flights included to Lukla and back?
Yes. Flights from Kathmandu or Ramechhap to Lukla, and Lukla back to Kathmandu or Ramechhap, are included for all members and staff.
What permits are included?
You receive the Sagarmatha National Park permit, TIMS permit, and a local rural area permit.
Is insurance included?
No. Travel insurance covering up to 6000 m is not included, and the operator lists $200.00 per person for that coverage.
Are hot showers or charging available during the trek?
No. Hot showers and battery charging are not included during the trek.
More Hiking & Trekking Tours in Kathmandu
More Guided Tours in Kathmandu
More Tour Reviews in Kathmandu
Not for you? Here's more nearby things to do in Kathmandu we have reviewed


Everest Base Camp Treks from Kathmandu, compared.
 ★ 5.0Everest Base Camp Trek – 14 DaysFrom $1,8001,499 reviews
 ★ 5.0Everest Base Camp TrekkingFrom $1,350485 reviews
 ★ 5.0Everest Base Camp Trekking – 13 DayFrom $1,399365 reviews
★ 5.0Everest Base Camp Trek -14 DaysFrom $1,420321 reviews
★ 5.0Everest Base Camp Trekking – 13 DayFrom $1,399365 reviews
★ 5.0Everest Base Camp Trek -14 DaysFrom $1,420321 reviews
 ★ 5.0Everest Base Camp Trekking – 2025/2026From $1,339199 reviews
 ★ 5.0Everest Base Camp TrekFrom $1,408193 reviews
14-Days Private Everest Base Camp TrekFrom $1,600152 reviews
★ 5.0Everest Base Camp TrekkingFrom $1,350146 reviews
★ 5.0Everest Base Camp TrekFrom $1,408193 reviews
14-Days Private Everest Base Camp TrekFrom $1,600152 reviews
★ 5.0Everest Base Camp TrekkingFrom $1,350146 reviews
Browse the lists this tour appears in