
REVIEW · EVEREST BASE CAMP TREKS FROM KATHMANDU
Everest Base Camp Trek – 14 Days
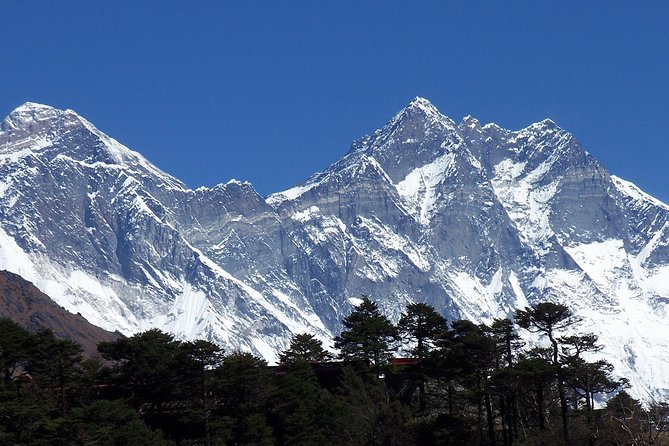
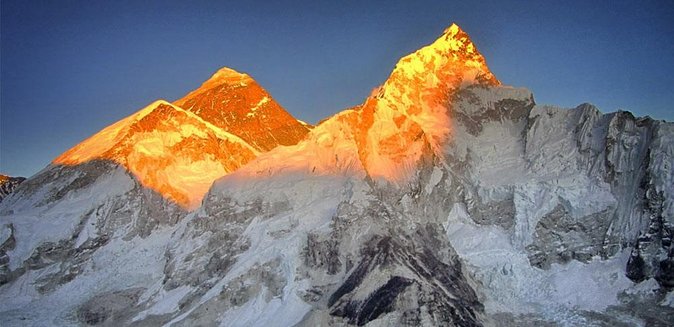
Everest Base Camp is famous for big views, but the real win here is small-group care from a guide who handles the hard parts of trekking and emergencies. You fly from Kathmandu to start the route, then spend days moving through Sherpa country, stone bridges, prayer flags, and high-altitude villages where daily life still follows mountain rhythms.
I love that you get porter help for 11 days, so you carry less weight and can focus on your own pace. I also like how the plan builds in acclimatization time, including a dedicated day near Namche and a hike day near Dingboche, which matters when breathing gets thin.
One drawback to consider: the itinerary includes very long hiking days and the route reaches over 5,300 m. If you are prone to getting hit hard by altitude, you will want to train well and take the acclimatization days seriously, even if you feel good.
Key things that make this Everest Base Camp trek work
- Small-group size (max 14 travelers) keeps the experience personal on busy days and in tighter village spaces.
- First-aid trained, government licensed guide plus emergency medical evacuation arrangements give you more peace of mind.
- Porters for 11 days (1 porter for 2 clients) means less hauling and fewer energy drains from extra weight.
- Acclimatization days at Namche and Dingboche help your body adjust before the harder high points.
- Filtered water on the trail (Katadyn Pocket water filter) reduces the everyday water stress.
- Lukla flights may route via Manthali during peak season, which can add a different kind of travel day.
The $1,800 price tag, and what you actually get for it
At $1,800 per person, this is not a budget shortcut to Everest. It is closer to a “pay for reliability” deal. Most of what makes Everest Base Camp hard is not just the scenery, it is the moving parts: domestic flights, permits, guide time, staff costs, and mountain logistics.
Here, your money covers the big essentials: Kathmandu hotel for two nights, domestic air Kathmandu to Lukla and back, a licensed trekking guide, and porters for 11 days. It also includes the park entry permit and related local trekking fees, plus most meals and on-trail guesthouse lodging. When you add in emergency gear planning and medical evacuation arrangements, the value starts to make sense, especially if you want a smooth experience without chasing details.
What is not included is also important for your budget planning. You will still pay for travel insurance that covers high-altitude rescue and evacuation, plus lunch and dinner in Kathmandu, and you are responsible for personal trekking gear. Tips are also expected. In plain terms: the tour is set up to cover the mountain plan, but you still own your insurance and personal kit.
You can also read our reviews of more hiking tours in Kathmandu
Kathmandu warm-up: how your trek really starts
Day 1 is built around getting you settled without stress. You land at Tribhuvan International Airport, and a team member meets you with an Ace the Himalaya signboard. Then you take a private tourist vehicle transfer to your 3-star twin-share accommodation in Kathmandu for two nights, with breakfast included.
Why this matters: Kathmandu can feel chaotic the first day, even when everything goes right. A planned arrival and transfer means you spend your energy sleeping and hydrating, not running around town trying to sort out transportation. You also get the chance to do your final fit-check on boots, socks, and layers.
A small note that you will appreciate on trek: in the Kathmandu days, you are not eating everything included. Lunch and dinner in Kathmandu are not part of the package, so plan for that in your food budget.
Getting to Lukla: the flight route can change
On Day 2, you fly from Kathmandu toward Lukla, but there is a key detail. During peak periods with traffic congestion at Kathmandu airport (noted for months including March, April, May, and October), the trek’s flight sector can shift to Manthali Airport in Ramechhap instead of flying straight from Kathmandu to Lukla as usual.
This is not a dealbreaker. It is a reminder that Everest logistics are real-world logistics. Weather and runway congestion happen. When the route changes, you should expect a different kind of travel day, even if the goal stays the same: you begin trekking after reaching the Lukla side.
Why I like that this is addressed up front: it saves you from surprise. Your job is to keep your head clear and be ready for a flight day that may not look exactly like the textbook version.
Day-by-day: what each stop does for your body and your eyes
Day 3 to Namche Bazaar: suspension bridges and Dudh Koshi rhythm
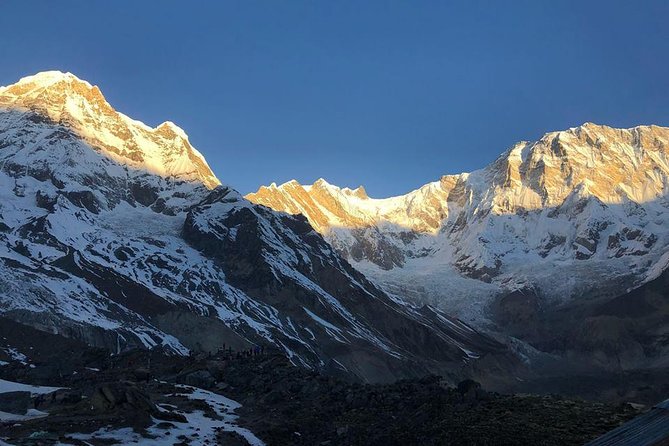
You start trekking along the banks of the Dudh Koshi, crossing multiple suspension bridges strung with prayer flags. This is one of those early-route stretches where the effort feels steady and you get your legs used to frequent changes in elevation and footing.
Then you enter Sagarmatha National Park. That matters because it is not only about paperwork. You are moving through an ecosystem that is tightly managed, and you will notice that the trail and villages are set up for trekkers but still feel like real communities.
A practical consideration: bridges and uneven paths can be slippery, especially with morning mist. Trekking poles help, and it is worth taking your time here rather than racing to “get it done.”
Day 4 in Namche: a full acclimatization day plus Sherpa Museum
Day 4 is a slow-and-smart day in Namche Bazaar. Instead of pushing higher, you acclimatize and adjust to thinning air. You also walk to a Sherpa Museum, which focuses on Sherpa traditions and customs.
Why this is a great setup: Namche sits at a point where “I feel okay” can trick you. A museum visit also helps you break the monotony of walking up and down without losing the cultural side. You are still moving, but not climbing hard.
Day 5 to Tengboche Gompa: the route turns dramatic
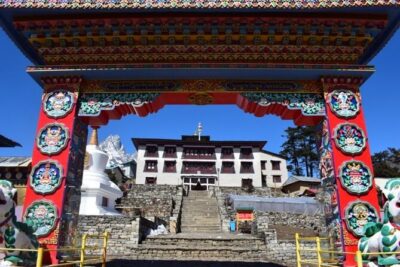
From Namche, you continue with a view-rich route along the Dudh Koshi area, then reach around 3,860 m when you arrive at Tengboche. The big draw here is Tengboche Gompa, a monastery you can visit inside.
What you should expect: the trail tends to feel more scenic and atmospheric as you get deeper into the Khumbu region. On days like this, I find it pays to dress in layers. Mornings can feel cool, and later in the day the sun can be strong even at altitude.
A possible drawback: monasteries and viewpoints can mean time outside when you are tired. If you are sensitive to cold, plan extra warm layers so you are not shivering through the best moments.
Day 6 to Dingboche: mani stones, bridges, and a steady climb
Day 6 takes you toward Dingboche. The route drops to Debuche, crosses another suspension bridge over the Imja Khola, and continues climbing, including a stop area near Pangboche with thousands of mani stones.
This day is your “work day.” You are still walking, but you are also noticing how the settlements look more austere the higher you go. Guesthouse life starts to feel more basic, and that is normal. Bring a method for staying clean and comfortable (wipes help more than you think).
Day 7 acclimatization near Dingboche: Nangkartshang viewpoints
Day 7 is another key acclimatization day. You do not push toward Everest Base Camp today. Instead you hike to Nangkartshang peak just above Dingboche, which is an excellent viewpoint.
Why it works: you get the altitude stimulus without forcing a long “gain” day. It trains your pace and your mind for the kind of effort you will need later.
Tip for you: go slow on the way up and treat it like practice. If you sprint early, the mountain charges you later.
Day 8 to Lobuche: Khumbu Glacier edges and memorial stones
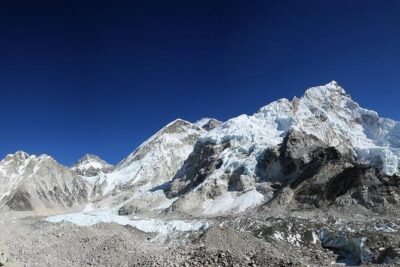
Today you head to Lobuche, continuing along the lateral moraine of the Khumbu Glacier. The trail also passes stone memorials for climbers who have perished on nearby summits.
This is emotionally heavier than earlier days. Even if you are focused on hiking, you cannot ignore the memorials. It is a reminder that Everest is not a themed hike. It is real risk, and the best way to honor the place is to hike responsibly.
Practical note: glacier-edge routes can feel long and repetitive. Keep snacks and water consistent so you are not making major decisions when you are already tired.
Day 9 to Everest Base Camp: the high point without mountaineering gear
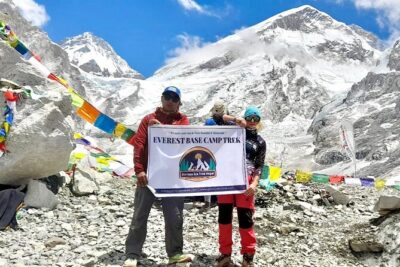
This is the classic push day. You hike along the Khumbu Glacier and up to Everest Base Camp at 5,365 m. This is the closest you can get to Mt. Everest without mountaineering equipment.
Why it is worth it: you do not climb technical ice. You still work hard. You just get to stand in the “this is Everest” zone, surrounded by the scale of the mountains and the busy reality of expedition history.
What can feel hard: altitude plus effort. Even when the route is “just hiking,” you will feel your breathing. If you have even mild altitude symptoms, tell your guide early. That is when a good guide earns their keep.
Day 10 to Kala Pattar: a demanding reward day
Day 10 is your big “work for it” day. You climb Kala Pattar, a small peak at around 5,555 m. It is described as one of the most difficult yet rewarding parts of the trek, and it tends to be the day many people remember most.
Expect: steep sections, slow steps, and a strong payoff in views. The ascent is demanding, and the altitude at this elevation means you conserve energy. If you try to keep the same pace as lower altitudes, you will slow down or pay later.
Day 11 down to Namche: the legs get a break, the mind settles
You leave the high country behind and descend via Pangboche and Tengboche back to Namche Bazaar, arriving in the afternoon.
Descending feels good at first, but it can hurt knees and ankles. Take your time on rocky descents. Trekking poles can turn pain into control.
This day also gives you a mental reset. Once you descend, your body starts to relax into the idea that you might actually finish.
Day 12 return to Lukla: the finish feels real
Day 12 brings you back to Lukla. You will use this last trekking day to reflect as a group and celebrate the achievement.
That group moment matters. Everest Base Camp can be a personal goal, but the best part of trekking with a small team is shared context, shared encouragement, and help when someone hits a rough patch.
If you are going solo, you should still enjoy the team vibe. This tour runs as a small group, and your guide and porters become your daily support system.
Day 13 flight back to Kathmandu: one last mountain look
You fly back to Kathmandu on the 35-minute scenic sector, then get met and transferred as needed. You also get time to process what just happened, because you are back in a city environment again.
A practical reality: after altitude, you may feel slightly “flat” when you arrive. Drink water, eat normally, and sleep when you can.
Day 14 airport drop-off: the trek ends, the memories don’t
Your last day is straightforward. The tour concludes with a transfer to Tribhuvan International Airport for your departure flight.
The guide and porter team: why the small details matter
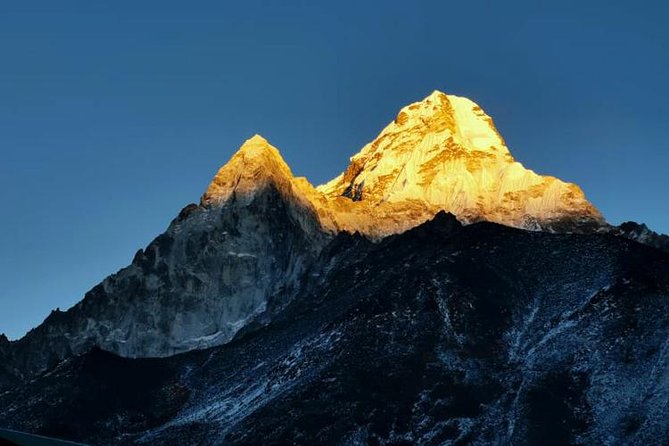
This trek is set up for safety and comfort, not just movement. You get a government licensed English-speaking trekking guide who is first-aid trained and who has an emergency response plan with evacuation arrangements in worst-case scenarios.
What I take from the best feedback is the human factor. Past trekkers have named guides like Kishor, Chris, Maddy, and Rajendra Khatry for doing the same things you want in the mountains: clear communication, local decision-making, safety focus, and personal attention. You also have a strong porter team, including names like Saman and Sher, who are praised for hard work and for keeping the mood up while still staying attentive.
Porter service is for 11 days, with 1 porter for every 2 clients. That ratio matters because it reduces the chance that you feel “responsible” for hauling everything yourself. It also typically means you can pack smarter, carry what you need personally, and let the porter team handle the heavier shared load.
Meals, water, and day-to-day comfort you should plan for
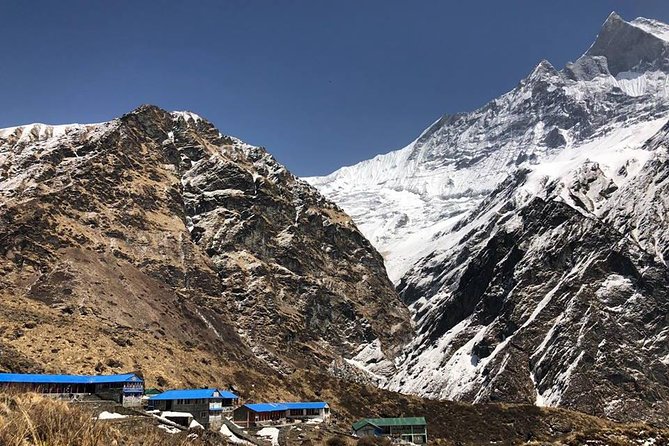
The tour includes all standard meals during the trek: breakfast, lunch, and dinner are covered on trekking days (and you handle Kathmandu meals separately). You also get seasonal fruits during the trek, which is a small but real morale boost when you are eating the same style of food for days.
Water is a major question on Everest routes. Here, you use filtered water with a Katadyn Pocket water filter. This helps you stay consistent without relying on guesswork.
Still, you should plan your own comfort choices. Think about:
- quick-dry layers for changing temps
- a small day pack for your essentials
- snacks for when you need a boost between meals
- a hat and sun protection
The package includes an Ace the Himalaya duffel, trekking map, sun hat, and a completion certificate, which is a nice extra because you are not paying separately for those basics.
What you need to bring, and what you should not wing
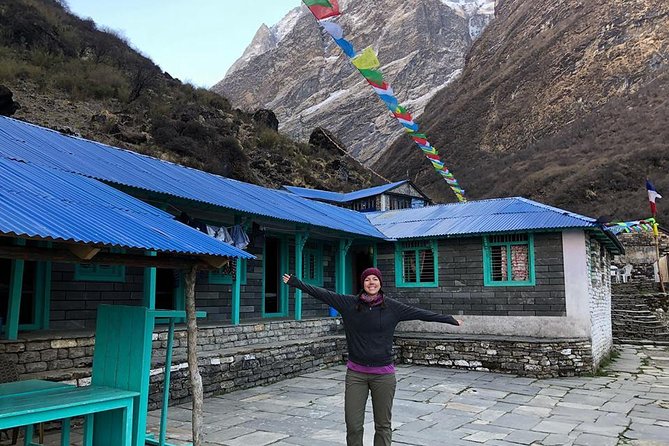
Not included is personal trekking equipment, so you should pack based on your own gear needs. This matters because the trek runs from Kathmandu nights into high-altitude days, where small mistakes cost a lot of energy.
Even with a filter and good support, you will still be responsible for:
- your personal cold protection
- footwear that fits your feet well
- your layers strategy
- basic hygiene items
If you are unsure what to bring, treat it like homework before you go. The mountain punishes last-minute decisions.
Who this Everest Base Camp trek is best for
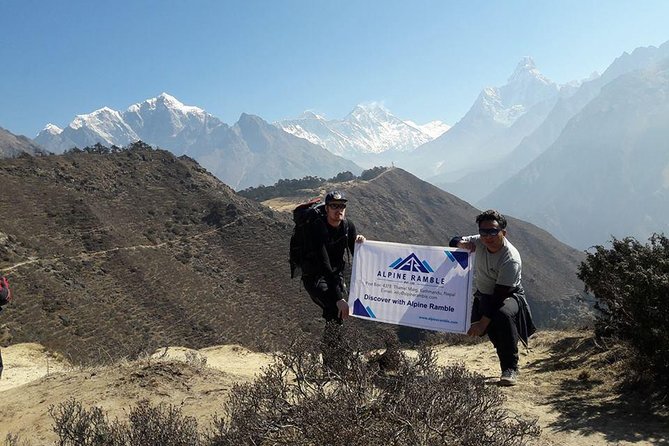
This is a good fit if you want:
- a small-group trek where you are not lost in a crowd
- guided safety and planned acclimatization
- porter support so you can focus on the hike
- a classic Everest route experience reaching Base Camp and Kala Pattar
It might be less ideal if you hate long days, have knee issues without a plan for slow descents, or know you struggle with altitude. The route is physically demanding by design, and it is not a short “see Everest from a viewpoint” trip.
Also, if you want to travel solo, there is a single surcharge of USD 250 if there is no existing group to share accommodation with you. You are still valid for booking, but the cost changes depending on whether you match into a group.
Should you book this Everest Base Camp trek?
If you want Everest Base Camp with strong structure, this is an easy “yes” for most hikers. The price is tied to the things that matter most: flights, guide and porter support, permits, trail lodging, meals, and water filtering. The route also includes real acclimatization time, not just “walk higher until you adjust.”
Before you book, be honest about two points. First, you must be ready for long hiking days and a lot of time at altitude, especially on the Base Camp and Kala Pattar days. Second, budget for what is not included, especially travel insurance and Kathmandu meals.
If those boxes fit you, you are set up for a meaningful, well-managed mountain trip that keeps your focus on the hike and the views.
FAQ
What is included in the Everest Base Camp trek package?
You get airport and hotel transfers in a private vehicle, 2 nights of 3-star twin-share accommodation in Kathmandu with breakfast, trekking guide and porter services, guesthouse accommodation on the trail, most meals during the trek, trekking permits and fees, Kathmandu to Lukla and back airfare (including airport departure tax), a trekking map and sun hat, a first-aid kit, filtered water on the trail using a Katadyn Pocket water filter, and emergency medical evacuation arrangements in the worst scenario.
Do you have porter support on this trek?
Yes. Porter service covers 11 days, with 1 porter for 2 clients. Your guide also handles day-to-day planning so you do not have to haul all your luggage yourself.
Is there an acclimatization day, or do you just keep hiking higher?
There are planned acclimatization days. You spend time acclimatizing in Namche Bazaar, including a hike to a viewpoint area, and later you also have an acclimatization day near Dingboche where you hike to Nangkartshang peak rather than pushing toward Base Camp.
What happens if flights to Lukla are affected by airport congestion?
The Lukla flights from Kathmandu can shift to Manthali Airport in the Ramechhap district during peak congestion periods. The trek days still follow the same overall plan once you reach the Lukla side.
How big is the group?
This tour runs with a maximum of 14 travelers.
What water setup do you provide on the trail?
You will use filtered water on the trail with a Katadyn Pocket water filter.
Is travel insurance included, and what about emergency evacuation?
Travel insurance covering emergency high-altitude rescue and evacuation is not included. The tour does include arrangements for emergency medical evacuation in the worst scenario, but you should still plan to have insurance yourself.
What is the cancellation refund window?
You can cancel up to 6 days in advance for a full refund. Cancel 2 to 6 days ahead for a 50% refund, and cancellations under 2 days before the start time are not refunded.
More Hiking & Trekking Tours in Kathmandu
More Tour Reviews in Kathmandu
Not for you? Here's more nearby things to do in Kathmandu we have reviewed

Everest Base Camp Treks from Kathmandu, compared.
 ★ 5.0Everest Base Camp TrekkingFrom $1,350485 reviews
 ★ 5.0Everest Base Camp Trekking – 13 DayFrom $1,399365 reviews
 ★ 5.0Everest Base Camp Trek -14 DaysFrom $1,420321 reviews
 ★ 5.0Everest Base Camp Trekking – 2025/2026From $1,339199 reviews
 ★ 5.0Everest Base Camp TrekFrom $1,408193 reviews
 ★ 5.014-Days Private Everest Base Camp TrekFrom $1,600152 reviews
★ 5.0Everest Base Camp TrekkingFrom $1,350146 reviews
★ 5.0Everest Base Camp TrekFrom $1,300123 reviews
★ 5.014-Days Private Everest Base Camp TrekFrom $1,600152 reviews
★ 5.0Everest Base Camp TrekkingFrom $1,350146 reviews
★ 5.0Everest Base Camp TrekFrom $1,300123 reviews
Browse the lists this tour appears in