
REVIEW · EVEREST BASE CAMP TREKS FROM KATHMANDU
Gokyo to Everest Base Camp Trek
Cho La forces you to respect the altitude. This Gokyo to Everest Base Camp trek is interesting because it pairs Gokyo Lakes with a real high pass crossing into Everest Base Camp country, plus the classic skyline moment at Kala Patthar. I also like the route logic, the way it staggers climbs and gives you acclimatization days before the big efforts.
The second thing I like is the support package. You get a licensed English-speaking trekking guide, a porter for every two clients, filtered water on the trail, and even a down jacket and sleeping bag to use and return, which lowers the logistics stress a lot. The one drawback to plan for: you will face very basic lodging at least once, including a dormitory-style setup in the remote Cho La approach area, and the trek is genuinely demanding even with careful pacing.
This is built for hikers with moderate fitness who are ready for long days, big altitude numbers, and weather that can turn fast. With a maximum of 15 people in the group and pickup arranged in Kathmandu, it feels structured, not chaotic.
Key things that make this trek worth your time
- Gokyo Lakes plus Gokyo Ri at 5,483 m: you get high-altitude lake views that many Everest routes skip.
- Cho La Pass timing before noon: starting early is a smart weather move when visibility and conditions matter.
- Everest Base Camp at 5,365 m: no mountaineering gear required, just glacier-area trekking up to the foot of Everest.
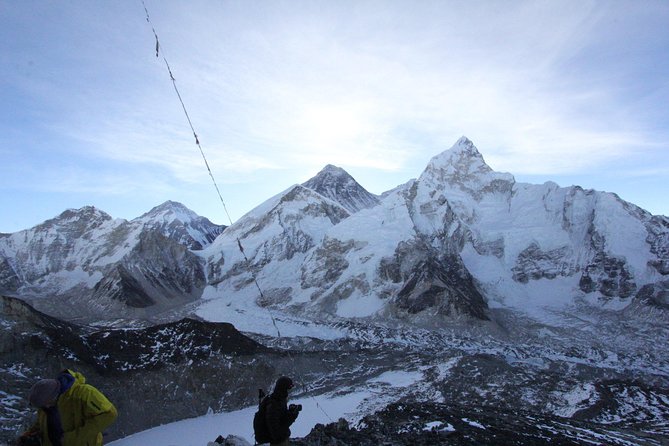
- Kala Patthar at 5,555 m: a hardest payoff day, built in for those who want the iconic vantage point.
- Porter support ratio (1:2): helps you stay focused on steps, not hauling.
- Small group size (max 15): easier to manage pacing, photos, and practical decisions on trail.
Why the Everest Circuit Feels Different: Gokyo First, Then Everest
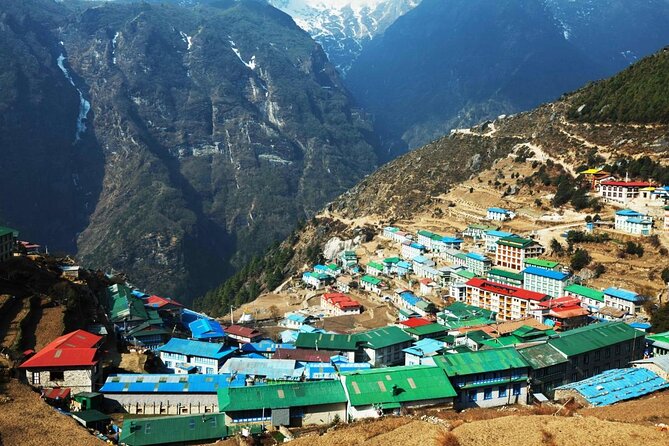
Most people picture Everest as one straight line: Namche, Base Camp, done. This route breaks that pattern. You go toward Gokyo, spend time in the lake country, cross Cho La Pass, then continue to Everest Base Camp and finish with Kala Patthar. That sequencing matters because your altitude build-up is spread across multiple mountain milestones, not one constant grind.
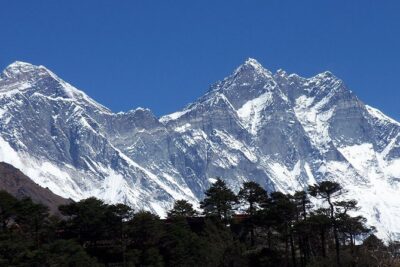
It also changes your scenery. Instead of only trekking through the Khumbu valley, you see glacier approaches, ridge viewpoints, and the high basin feel around Gokyo. The route is often described as adventurous, and that’s fair, because Cho La is not a casual walk. Still, the planning here is practical: early starts, acclimatization stops, and a schedule that aims to protect your lungs before the top days.
You can also read our reviews of more hiking tours in Kathmandu
Kathmandu Setup and the Lukla Flight: Where Planning Meets Reality
Your trek starts in Kathmandu with airport transfer and hotel time. You spend two nights in Kathmandu in a three-star hotel with twin-share or double rooms. That matters because it gives you a buffer day to sort out gear checks, last-minute items, and paperwork.
Then comes the move to Lukla. You fly from Kathmandu to Lukla (about 35 minutes) and you land at 2,804 m. This is one of those details that can make or break the experience. A flight gets you into the high zone quickly, which is great for time, but it also means you are not easing in from low altitude. For that reason, I like that the trek quickly builds in acclimatization work soon after.
One nice touch: you get Kathmandu to Lukla and back airfare included. That removes a big variable from your budget and makes the trip easier to plan as a single package.
Lukla to Phakding: Suspension Bridges and Your First Real Check of Breath
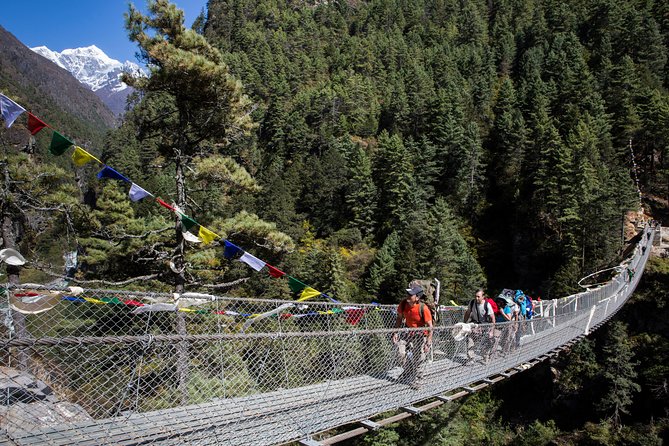
After you land in Lukla, the trek moves to Phakding. This day is about rhythm. You’ll be trekking along the Dudh Kosi river, crossing suspension bridges that are strung with prayer flags. Those bridges are not just decoration. They remind you that the trail is part walkway, part wild valley crossing, and that you are in a living travel corridor used by locals, not a theme park path.
At this stage, your job is simple: start steady. Many people feel fine in the first hour and overdo it after that. If you keep your pace controlled early, the rest of the route becomes harder in a manageable way instead of punishing.
Lodging and facilities are in guest house style. Meals are part of the package on the trek days (lunch and dinner, plus breakfasts in the included schedule), so you’re not spending time negotiating every meal stop.
Namche Bazaar Acclimatization: The Day You Actually Benefit From
You reach Namche Bazaar and then you spend a full day there to acclimatize and adjust to thinning air. This is a big deal. Going up too quickly is the fastest route to ruining the next several days, and a rest day in Namche helps you breathe better for the higher passes and viewpoints ahead.
Namche also gives you more than altitude. You’ll trek a short distance to a museum focused on Sherpa customs and traditional life. I like this kind of add-on because it turns a rest day into something meaningful, not just waiting around. It also helps you understand what you are seeing: the Sherpa communities, the long history of mountain livelihood, and the culture that supports trekking life.
In practical terms, Namche is where you can expect the trail to become more organized. You’ll start to see how groups manage pacing, layering, and water habits as conditions climb.
Phortse to Machhermo: Getting Higher Through Forest and Moraine Country
From Namche, the trek climbs through rhododendron forest and higher juniper and conifer zones on the way to Phortse. This section is often where people notice the environment shifting. In spring, rhododendron is mentioned as part of the trail character, and even outside peak season you can feel the higher, cooler air as the trees thin.
Then you move onward to Machhermo. The day includes a ridge climb with views both down-valley and up toward Cho Oyu, then a descent to a river, and another climb to reach the terminal moraine of the Ngozumpa glacier. That moraine detail matters because it hints at what is ahead: glacier terrain and huge mountain basins, not just tidy village paths.
One value here is the pacing. The route keeps moving, but it keeps layering in views, which helps you mentally handle altitude. Physically, this is also a step-up phase, so don’t try to “win the trek” on these days.
Into Gokyo: Lake Views, Ngozumpa Glacier Scale, and Two Nights That Matter
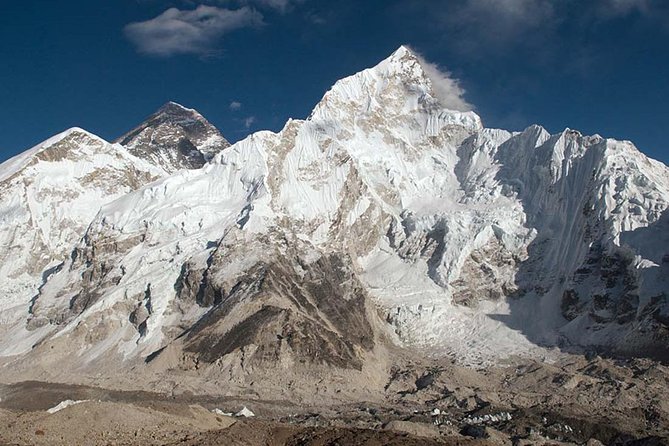
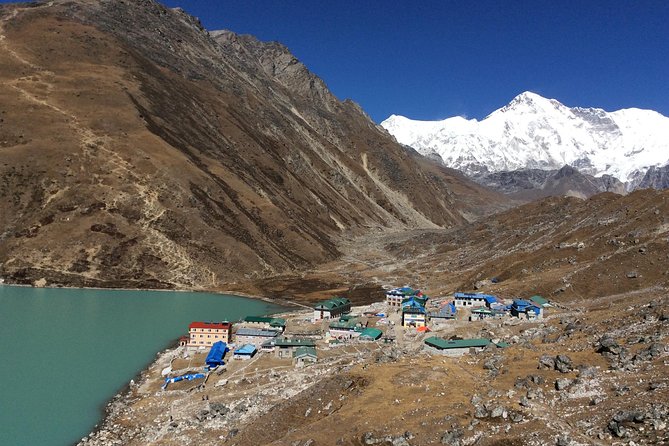
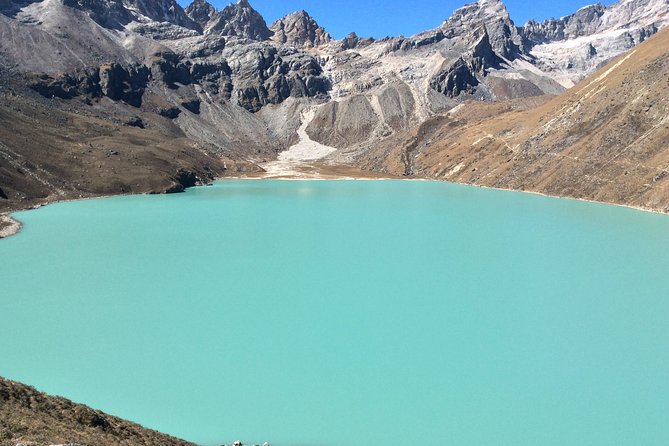
You reach Gokyo around 4,790 m and the trek gives you two nights there. That is not filler. Gokyo is a major destination, and time matters because it allows easier sightseeing and gives your body a little more chance to adapt before Cho La.
Gokyo itself is described as your base for the area, and you’ll have hiking and sightseeing time around the settlement. This is where the route earns its second identity. Lots of Everest itineraries go straight to the Everest side. Here, you get the lake country, the wider sky, and the sense of being inside the Everest circuit rather than passing through it.
Gokyo Ri Morning: The 30-Minute Climb That Can Steal Your Breath
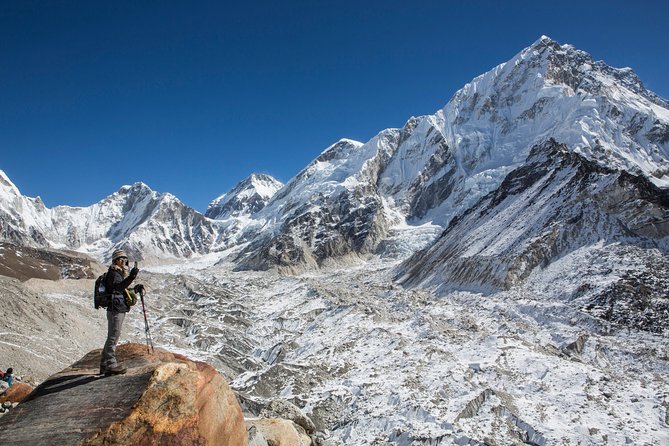
One morning hike takes you up to Gokyo Ri at about 5,483 m. The itinerary frames it as a steep climb that lasts roughly 30 minutes, but at this altitude, time estimates can be misleading. The reward is big: you get sweeping views over the Gokyo valley and surrounding peaks.
This is also the kind of day where early start discipline matters. A short climb can still be a major effort, so pace yourself and don’t treat it like a casual photo walk. The views are the point, but your lungs are the ticket price.
Thangnag and Cho La Approach: When Basic Lodging Becomes Part of the Deal
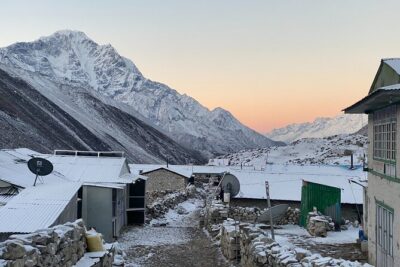
The trek heads toward the Cho La pass approach and reaches Thangnag. The lodging there is described as very basic, dormitory-based. That means less comfort and more noise, and it also means you should bring your cold-weather habits. Even if you feel warm in the daytime, nights can bite at high altitude.
This is one of the days where expectations matter most. You are not paying a mountain hotel price. You’re buying a route that reaches a high pass and still stays organized enough to get you there safely.
Cho La Pass Day: The Early Start Strategy That Can Save the Trek
Cho La is handled with serious timing. You start walking before sunrise, around 4:00 or 5:00 am, aiming to cross between 9:00 and 10:00 am. The logic is simple: you want to dodge bad weather conditions that can worsen later in the day.
You cross at about 5,300 m, and the crossing itself is the signature challenge of this itinerary. Expect a steep, physical day and pay attention to footing. When conditions are poor, the schedule flexibility and safety mindset of your guide become extra important.
I like that this tour is explicit about early starts and weather avoidance. That’s not just macho trekking talk. It’s practical planning for visibility and safety.
Lobuche and the Lead-Up to Everest Base Camp: Glacier-Adjacent Footsteps
After the pass, you move to Lobuche, described as reachable by a shorter trekking route, with the itinerary calling out around four hours. Shorter does not mean easy. It can still be high, cold, and tiring. But it gives you a mental reset after Cho La.
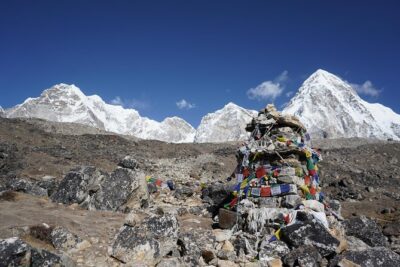
Lobuche is also closer to the Everest Base Camp feel. You’re moving into a landscape where the glacier and surrounding terrain become central to the trekking experience.
Everest Base Camp at 5,365 m: Close Enough to Feel the Weight
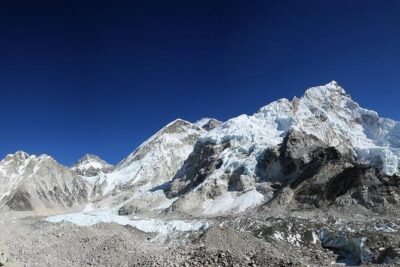
The next big day is Everest Base Camp. The trek is described as big and difficult, following the Khumbu Glacier and climbing up to Everest Base Camp at 5,365 m. This is the closest you can get to Everest without mountaineering gear.
So what should you expect? Cold, altitude strain, a slow moving rhythm, and a sense that the mountain is not “a view,” it’s a presence. At Base Camp, conditions can also affect your time on site, so be ready for the fact that visibility or wind might shape what you can do.
Also, because the day is described as difficult, your earlier pacing matters. If you conserve energy before this day, you’ll enjoy the moment more.
Kala Patthar: The Hard Reward Day
Kala Patthar is another standout. You climb Mt. Kala Patthar at about 5,555 m, and the itinerary frames it as one of the most difficult yet rewarding days. Most of the morning is spent ascending, which makes it a true test day.
This is the day that people usually talk about when they remember this trek long after the paperwork is forgotten. You’re climbing to a vantage point, so you’re trading comfort for a view. If you go in with the right mindset, you’ll treat it as the final “big chapter” rather than a random extra hike.
Descent Through Pangboche and Tengboche to Namche, Then Lukla
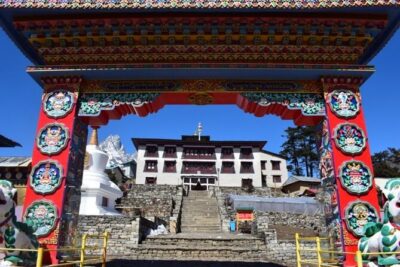
After Base Camp and Kala Patthar, the itinerary turns to descent and return. You leave the mountains behind on the way back to Namche Bazaar, trekking through Pangboche and Tengboche. Those stops are where you get monasteries and Buddhist sites, mentioned as part of the cultural experience at high elevation.
Then you return to Namche in the afternoon, and finally you head to Lukla as the last trekking day. There’s a big emotional release on this stage: you’ve done the hard altitude work, now you’re walking back to the start.
It also gives you time to reflect as a group, and you’ll have a free afternoon in Lukla.
Back to Kathmandu: One Last Flight and Some Very Real Perspective
The finish is the return flight from Lukla to Kathmandu. It’s a short scenic hop, about 35 minutes, and once you land you’re transferred back to the starting hotel. Then the trip ends with airport drop-off for your departure.
If you’ve been keeping a steady pace throughout, the last day feels lighter than you expect. Not easy, but lighter. That’s the psychological payoff of a well-structured high-altitude trek.
Price and Value at $2,200: What You Pay For, What You Avoid
At $2,200 per person, this trek costs serious money. The key question is what you are actually getting for that number.
Here’s what is included:
- Kathmandu hotel (2 nights) in a three-star property, twin-share/double rooms
- Guest house trekking accommodation for 14 nights, with attached toilets noted for Lukla, Phakding, and Namche
- A licensed English-speaking guide
- Porter support, 1 porter for every two clients
- Permits for trekking
- Kathmandu to Lukla and back airfare
- Trekking gear support, a down jacket and sleeping bag to use and return
- Filtered water using a Katadyn Pocket Water Filter
- Meals during the trek period (lunch and dinner, plus breakfasts in the included schedule)
- Seasonal fruits during the trek
- A free Ace the Himalaya duffel/kit bag and sun hat
- Airport transfers and government taxes and service charges
What is not included:
- Nepal entry visa, international flights
- Travel insurance that covers high-altitude rescue and evacuation
- Meals in Kathmandu (like lunch and dinner)
- Alcohol and personal drinks
- Tips for staff and drivers, which are expected
So is it good value? For this kind of high-altitude circuit, yes, because you’re buying organization plus the big ticket items: Lukla flights, guide, permits, and most of the essentials. The biggest add-on you should plan for is travel insurance. Skipping it is never worth it when you’re trekking around the 5,000 m range and crossing Cho La.
Guides and Porter Team: Safety First and Weather Flexibility
You can’t control snow, wind, or timing. What you can control is how your team handles it. The feedback for this operator highlights guides who manage tough weather by staying flexible with options and putting safety first.
Names that come up in the feedback include Nima, Raj N, Raj Kumar, Ramesh, and Ganesh, with Lakpa Sherpa also mentioned. Porters like Biroj and Sonam are repeatedly described as strong and cheerful, which is exactly what you want in a high pass and glacier-area schedule.
Even if conditions look fine on day one, weather can change quickly at altitude. This is where a guide’s judgment matters, especially for timing decisions around the pass and viewpoint days.
Lodging and Meals: Expect Guest House Reality, Not Resort Comfort
On most nights you will be in guest houses. The details provided say attached toilets are included in Lukla, Phakding, and Namche. Other stops like Thangnag are described as very basic dormitory-style. That is the kind of place where you should plan for cold, limited privacy, and the normal noise of shared rooms.
Meals are included on the trekking portion, which reduces daily decision fatigue. Still, you should expect that mountain food is different. Focus on eating enough, not perfect nutrition. The trek gives seasonal fruits, and you’ll want to use those calories when your appetite is low.
The water filter included is a big practical win. It reduces dependence on buying single-use bottles and helps you keep hydration steady on days that are physically demanding.
Who Should Book This Trek, and Who Should Reconsider
This itinerary is best for people who:
- Have moderate physical fitness
- Are comfortable with altitude, long walking days, and early mornings
- Like a route that mixes culture time and big viewpoint days, not just one straight hike
- Prefer a structured group with max 15 people rather than a loose DIY approach
You might reconsider if:
- You want resort-style comfort every night, because even when lodging is included, some nights are basic
- You’re not ready for long, demanding days like Base Camp and Kala Patthar
- You haven’t lined up travel insurance that covers high-altitude rescue and evacuation
If you’re new to altitude trekking, be honest with yourself. The acclimatization stop in Namche helps, but the route still climbs into serious elevation territory multiple times.
Should You Book This Gokyo to Everest Base Camp Trek?
If your dream includes both Gokyo Lakes and Everest Base Camp, this route is a strong match. The biggest reasons to book are the full itinerary flow, the early Cho La strategy, and the practical inclusions that protect you from the hardest logistics problems, like guide coverage, permits, Lukla flights, and core gear like a sleeping bag and down jacket.
If your priority is comfort only, or you dislike early-morning starts, you may find this challenging. But if you want an organized, small-group Everest circuit with a real shot at the classic viewpoint payoff at Kala Patthar, this is the kind of trek that earns its reputation.
FAQ
How long is the Gokyo to Everest Base Camp trek?
The duration is about 17 days.
Where does the trip start and how do you get there?
It starts at Tribhuvan International Airport in Kathmandu, with a start time of 8:00 am. You also get Kathmandu to Lukla and back airfare included.
What is included in the tour price?
Included are airport transfers, Kathmandu hotel (2 nights) in a three-star property, trekking accommodations for 14 nights, a licensed English-speaking trekking guide, porter support (1 porter for every two clients), permits, down jacket and sleeping bag (to be returned), filtered water on the trail, seasonal fruits, and meals during the trek period. Lunch and dinner in Kathmandu are not included.
Do I need my own trekking equipment?
Not fully. The tour includes a down jacket and sleeping bag for the trek to be returned, but personal trekking equipment is not included.
What group size should I expect?
The maximum group size is 15 travelers.
What happens if weather prevents the trek?
This experience requires good weather. If it is canceled due to poor weather, you’ll be offered a different date or a full refund.
More Hiking & Trekking Tours in Kathmandu
More Tour Reviews in Kathmandu
Not for you? Here's more nearby things to do in Kathmandu we have reviewed


Everest Base Camp Treks from Kathmandu, compared.
 ★ 5.0Everest Base Camp Trek – 14 DaysFrom $1,8001,499 reviews
 ★ 5.0Everest Base Camp TrekkingFrom $1,350485 reviews
 ★ 5.0Everest Base Camp Trekking – 13 DayFrom $1,399365 reviews
★ 5.0Everest Base Camp Trek -14 DaysFrom $1,420321 reviews
★ 5.0Everest Base Camp Trekking – 13 DayFrom $1,399365 reviews
★ 5.0Everest Base Camp Trek -14 DaysFrom $1,420321 reviews
 ★ 5.0Everest Base Camp Trekking – 2025/2026From $1,339199 reviews
 ★ 5.0Everest Base Camp TrekFrom $1,408193 reviews
14-Days Private Everest Base Camp TrekFrom $1,600152 reviews
★ 5.0Everest Base Camp TrekkingFrom $1,350146 reviews
★ 5.0Everest Base Camp TrekFrom $1,408193 reviews
14-Days Private Everest Base Camp TrekFrom $1,600152 reviews
★ 5.0Everest Base Camp TrekkingFrom $1,350146 reviews
Browse the lists this tour appears in